
Thursday, January 12, 2012
Book Covers
I am working on a bookshelf for our living room (project info coming soon) and in between applying cotes of paint I am working on the items that will go on the book shelf. So I got some brown paper bags and I made some stencils with my Cricut. Then I used a white ink pad to apply the design and this is what I ended up with.

Tuesday, January 3, 2012
Leftover Frames
It's a long story, but I ended up with extra frames after the photo display project and so I painted and nailed them together to make this for my dining room.


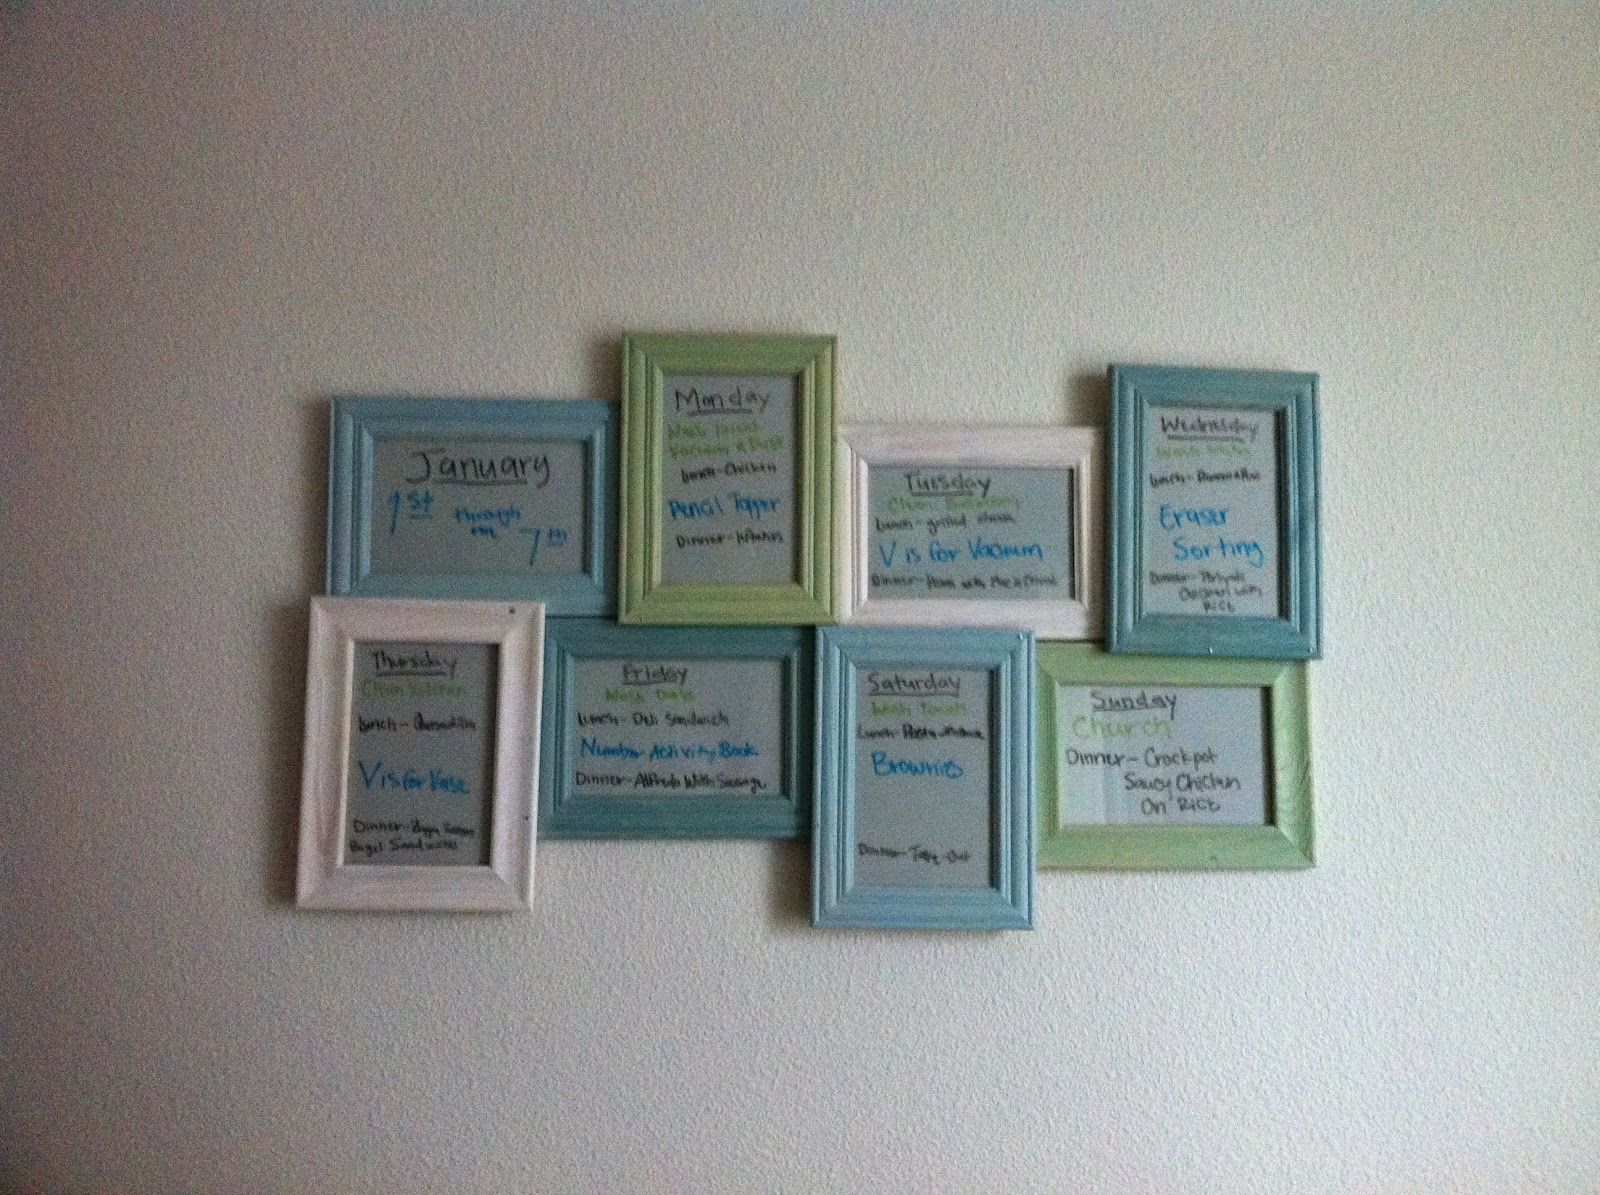
Because I am a very organized person who loves lists, this makes me feel all warm and fuzzy inside. This is my menu/chore list/activity planner.

Thank you Pinterest for making me aware of the fact that glass can be used as a dry erase board :)
Photo Display
This past summer there were a lot of family photos taken and I wanted to do something unique to display them. I saw a picture on Pinterest of this frame:

 It just happened to work out that if I cut one sheet of bead board in half they would be the perfect length. Because the boards were seven inches wide I left them at that width and cut a length of 5" so I ended up with a 5x7.

I mixed some varnish with the paint to give it a distressed look. I figured out it is easiest to pour as much varnish as you need and then add enough paint to make the color you want.
The final step was to line all the pieces up and nail them together. I just put four nails through the wood to hold it together and made the nails far enough apart that I could just slide the glass under the heads of the nails.
 And here are what the frames look like up close.
Originally I was going to put these on my matle but they just weren't the right size for it. Instead I added some ribbon to the back of the frames and attached them to a dowel. Then I covered the dowel in some floral picks I got at Michael's. And here is the finished product.


And I thought to myself, "I can totally make that!"
I asked my wonderful husband for a jigsaw and a gift card to Home Depot for Christmas and he came through. I bought some bead board (7-36"x7" sheets for around $12) and some sample paints, which were fifty cents each. And I went to the dollar store and got some 4X6 frames for the glass.


I mixed some varnish with the paint to give it a distressed look. I figured out it is easiest to pour as much varnish as you need and then add enough paint to make the color you want.
The final step was to line all the pieces up and nail them together. I just put four nails through the wood to hold it together and made the nails far enough apart that I could just slide the glass under the heads of the nails.

Originally I was going to put these on my matle but they just weren't the right size for it. Instead I added some ribbon to the back of the frames and attached them to a dowel. Then I covered the dowel in some floral picks I got at Michael's. And here is the finished product.

Dress Up Station
I decided that I wanted to give my daughter a dress-up station for Christmas, which of course meant I needed to make one. I saw a picture on Pinterest (I can't tell you how often I say those words) of a cute one made out of a dresser. Unfortunately I had no spare dressers and being in the middle of a move I really didn't feel like going and buying one to haul around. So the hunt began! I started looking at everything as a perspective dress up station. As we were moving everything out of our storage shed and into our new place I came across this little beauty.
 I know, crappy picture. But this is my first ever blog post so cut me some slack! I wish I had gotten a photo of the inside, but oh well. This is one of the pieces to those build your own storage center things you find at Target or Wal-mart. It is basically a rectangle with two removable shelves on the inside (pretend you don't see the little white square on the front. That is just a child lock I used when it contained other items). So I got to work disassembling it. I knew I needed a dowel of some sort to hang her dresses, a few shelves for shoes, and some hooks for purses. Here is what I came up with:


In a nutshell what I did was remove the door and the shelves and then, using my handy dandy drill, attached them to the outside of the cupboard. I covered them with some cute contact paper that I found at Michael's for $1 a roll, because they just needed to be a little more feminine. Then I drilled a hole through the cupboard and hammered in a dowel so I could hang her dresses. Lastly, I added some hooks for her purses and other assorted accessories.
My daughter seems to like it quite a lot. She asks to wear a "swirly princess dress" everyday and then proceeds to pick out shoes and a purse to go with it. Success!
Subscribe to:
Comments (Atom)